Percussion vs. Pressure Flaking

Ivan Beste – contemplating the evidence for how past peoples made stone tools.

It isn’t our fault that we take the little things for granted. Now, when I say “little” I mean the bare bones minimum: food, shelter, clothing but also tools. Tools of course being our modern stainless-steel hammers, screwdrivers, and knives. We don’t usually think about the smithing or creation of the object. When I am in the tool aisle of Home Depot, I usually just think, “Is this hammer really worth twenty-five bucks?”

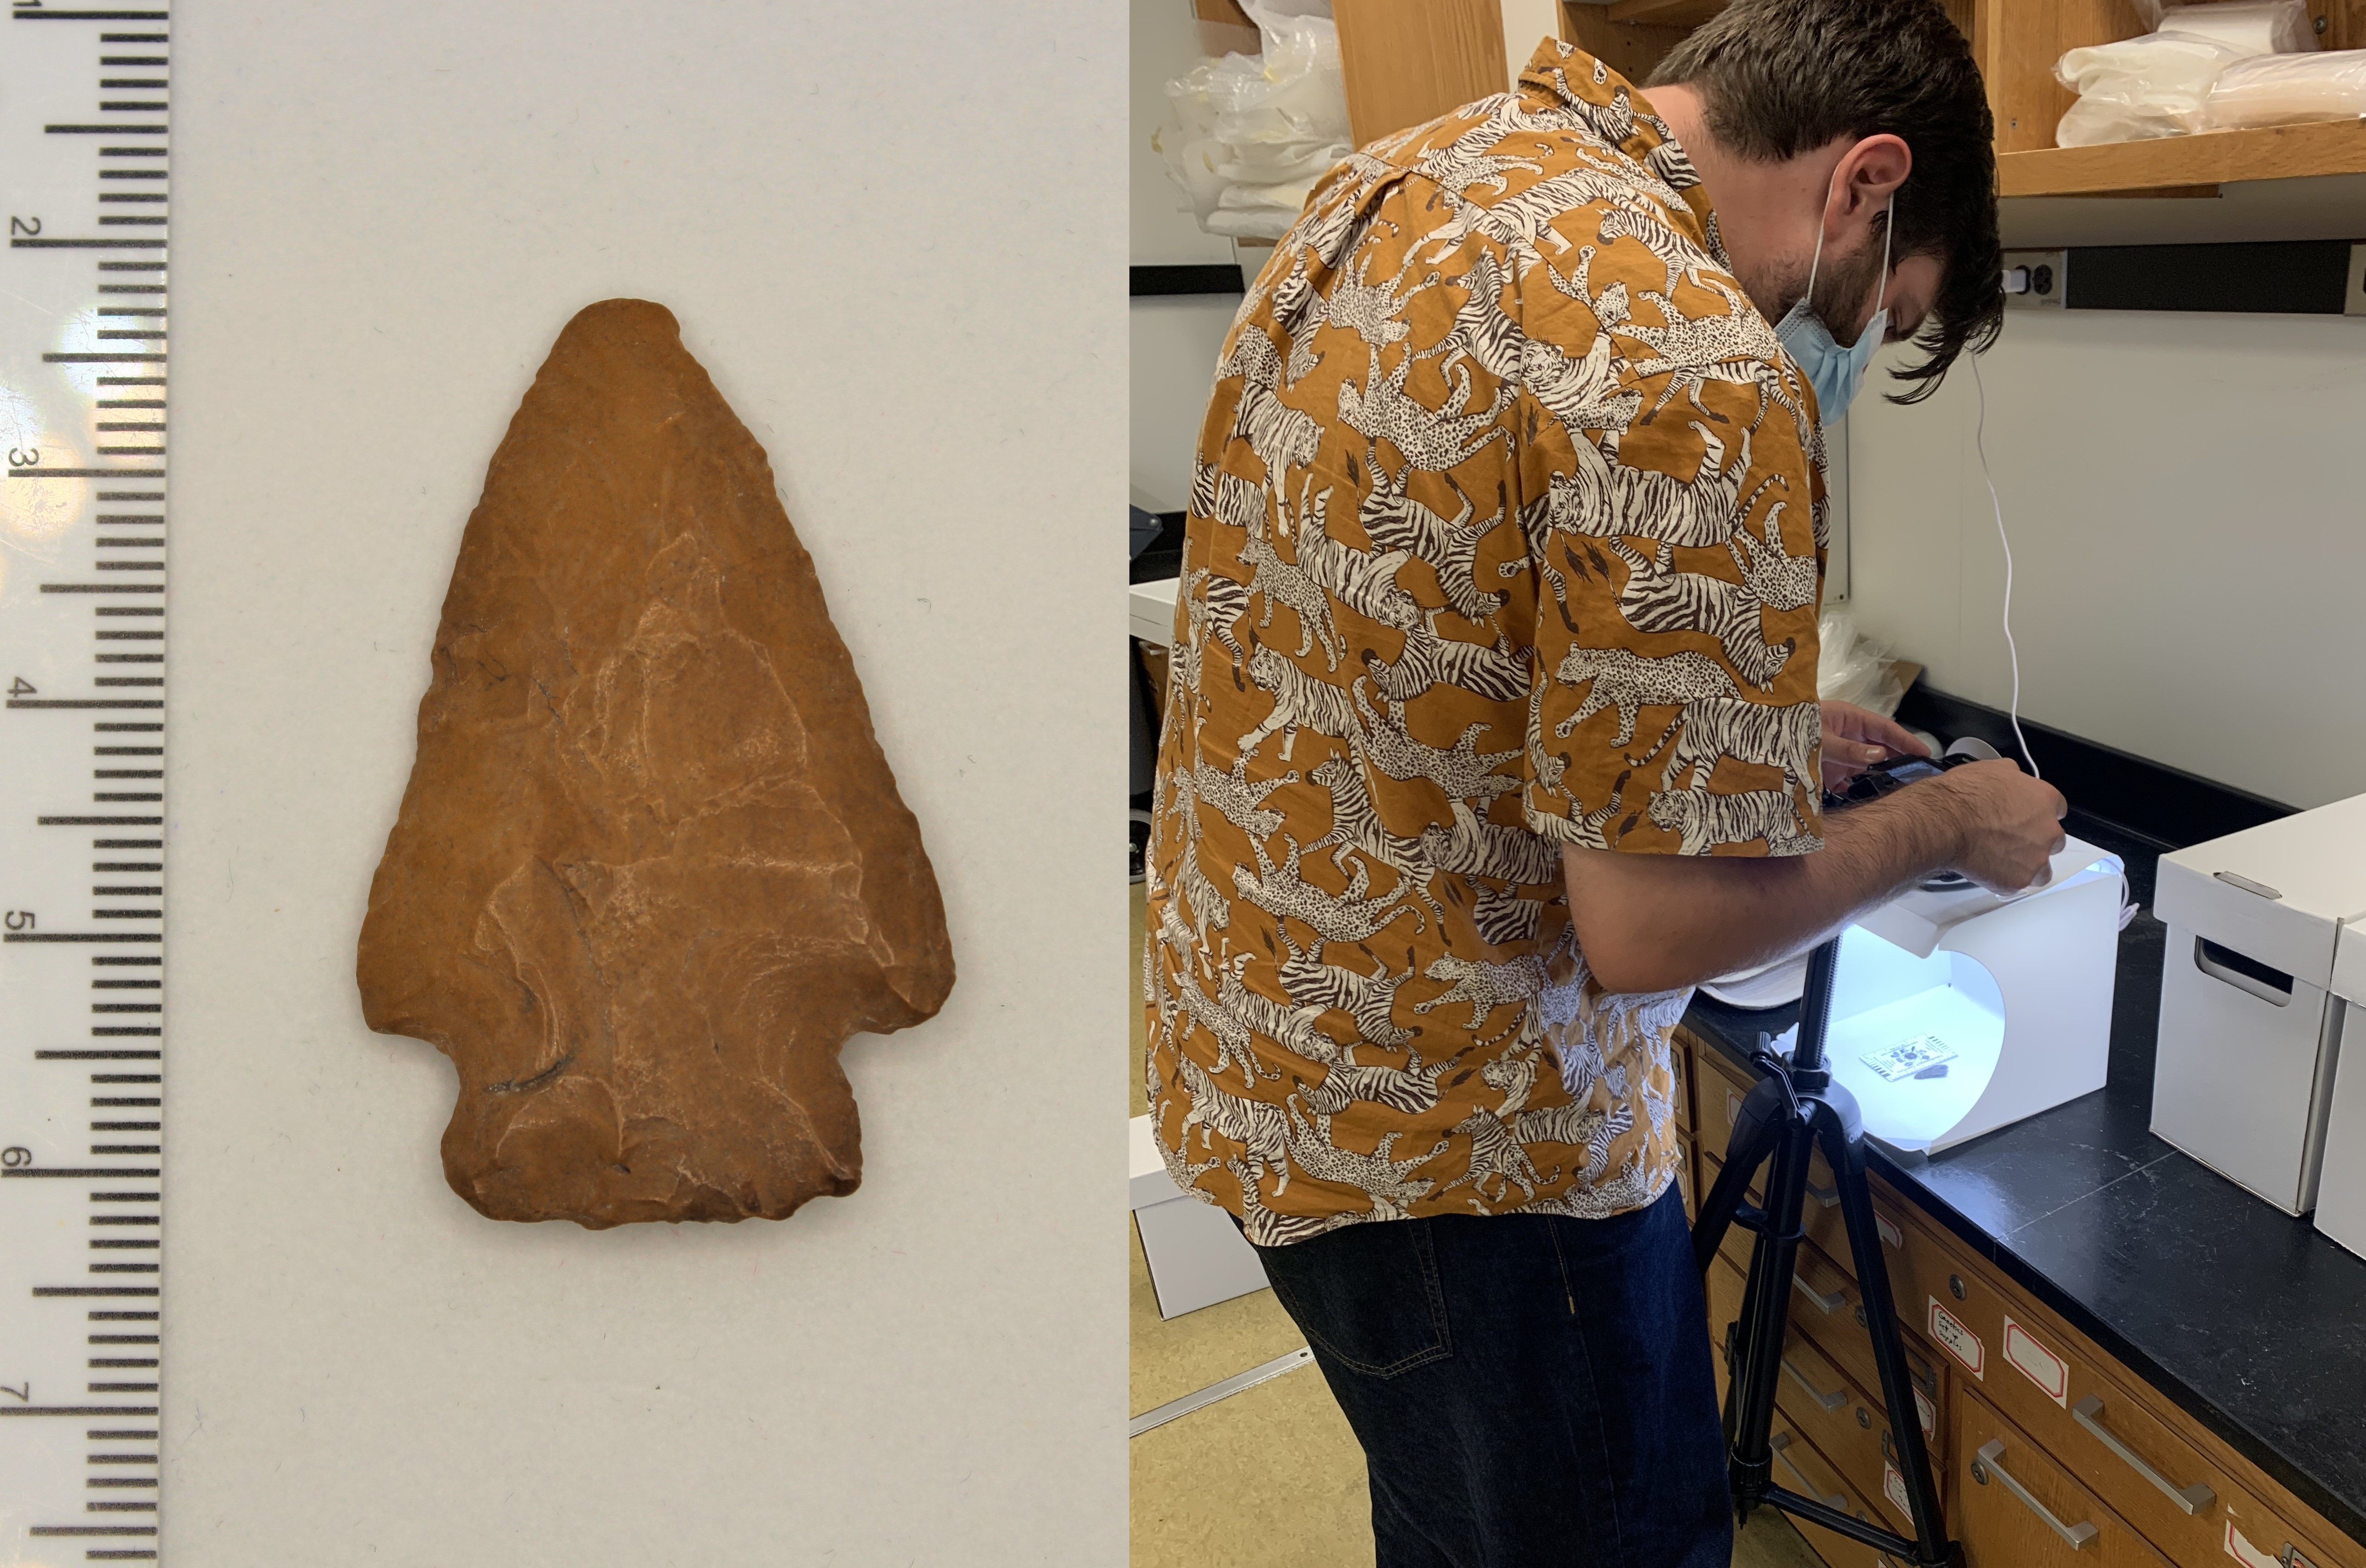
Prehistoric people were different. For our ancestors, the tool was made by their own hands and for their own hands. The wielder was also the manufacturer and they had to devise advancements for hand tools through experimentation and practice. With this said, archaeologists have found a plethora of lithic tools all over the world. Everything from scrapers and agricultural tools to projectile points and grooved axes. One thing these tools have in common is the manner of their creation. For example, percussion and pressure flaking are techniques that have been used to create a variety of stone tools for thousands of years.

Percussion flaking is simply the process of creating a sharp edge or removing large chunks (flakes) from a stone using blunt force. Percussion is used to reduce a stone core (origin material) into something smaller and more manageable; this also leads to the creation of “blanks” or “preforms” which are stored for later use. In some instances, other devices like chisels could be added to this technique, aptly called indirect percussion. Percussion flaking may sound simple enough, but it is a skill that requires quite some training. One bad percussive hit could send sharp pieces of the core material flying uncontrollably or ruin the tool.

Pressure flaking in turn is the little brother of percussion flaking. Pressure flaking is the removal of stone from the edges with a pointed implement. This is done after the initial creation of the preform with the use of percussion flaking. Pressure flaking was accomplished with various implements such as stone, bone, and in later times, copper, and other metals. These pieces resulted in sharper edges and more complex lithic tools. This technique, like the previous, with a slip of the hand can also easily result in harm to an untrained manufacturer.

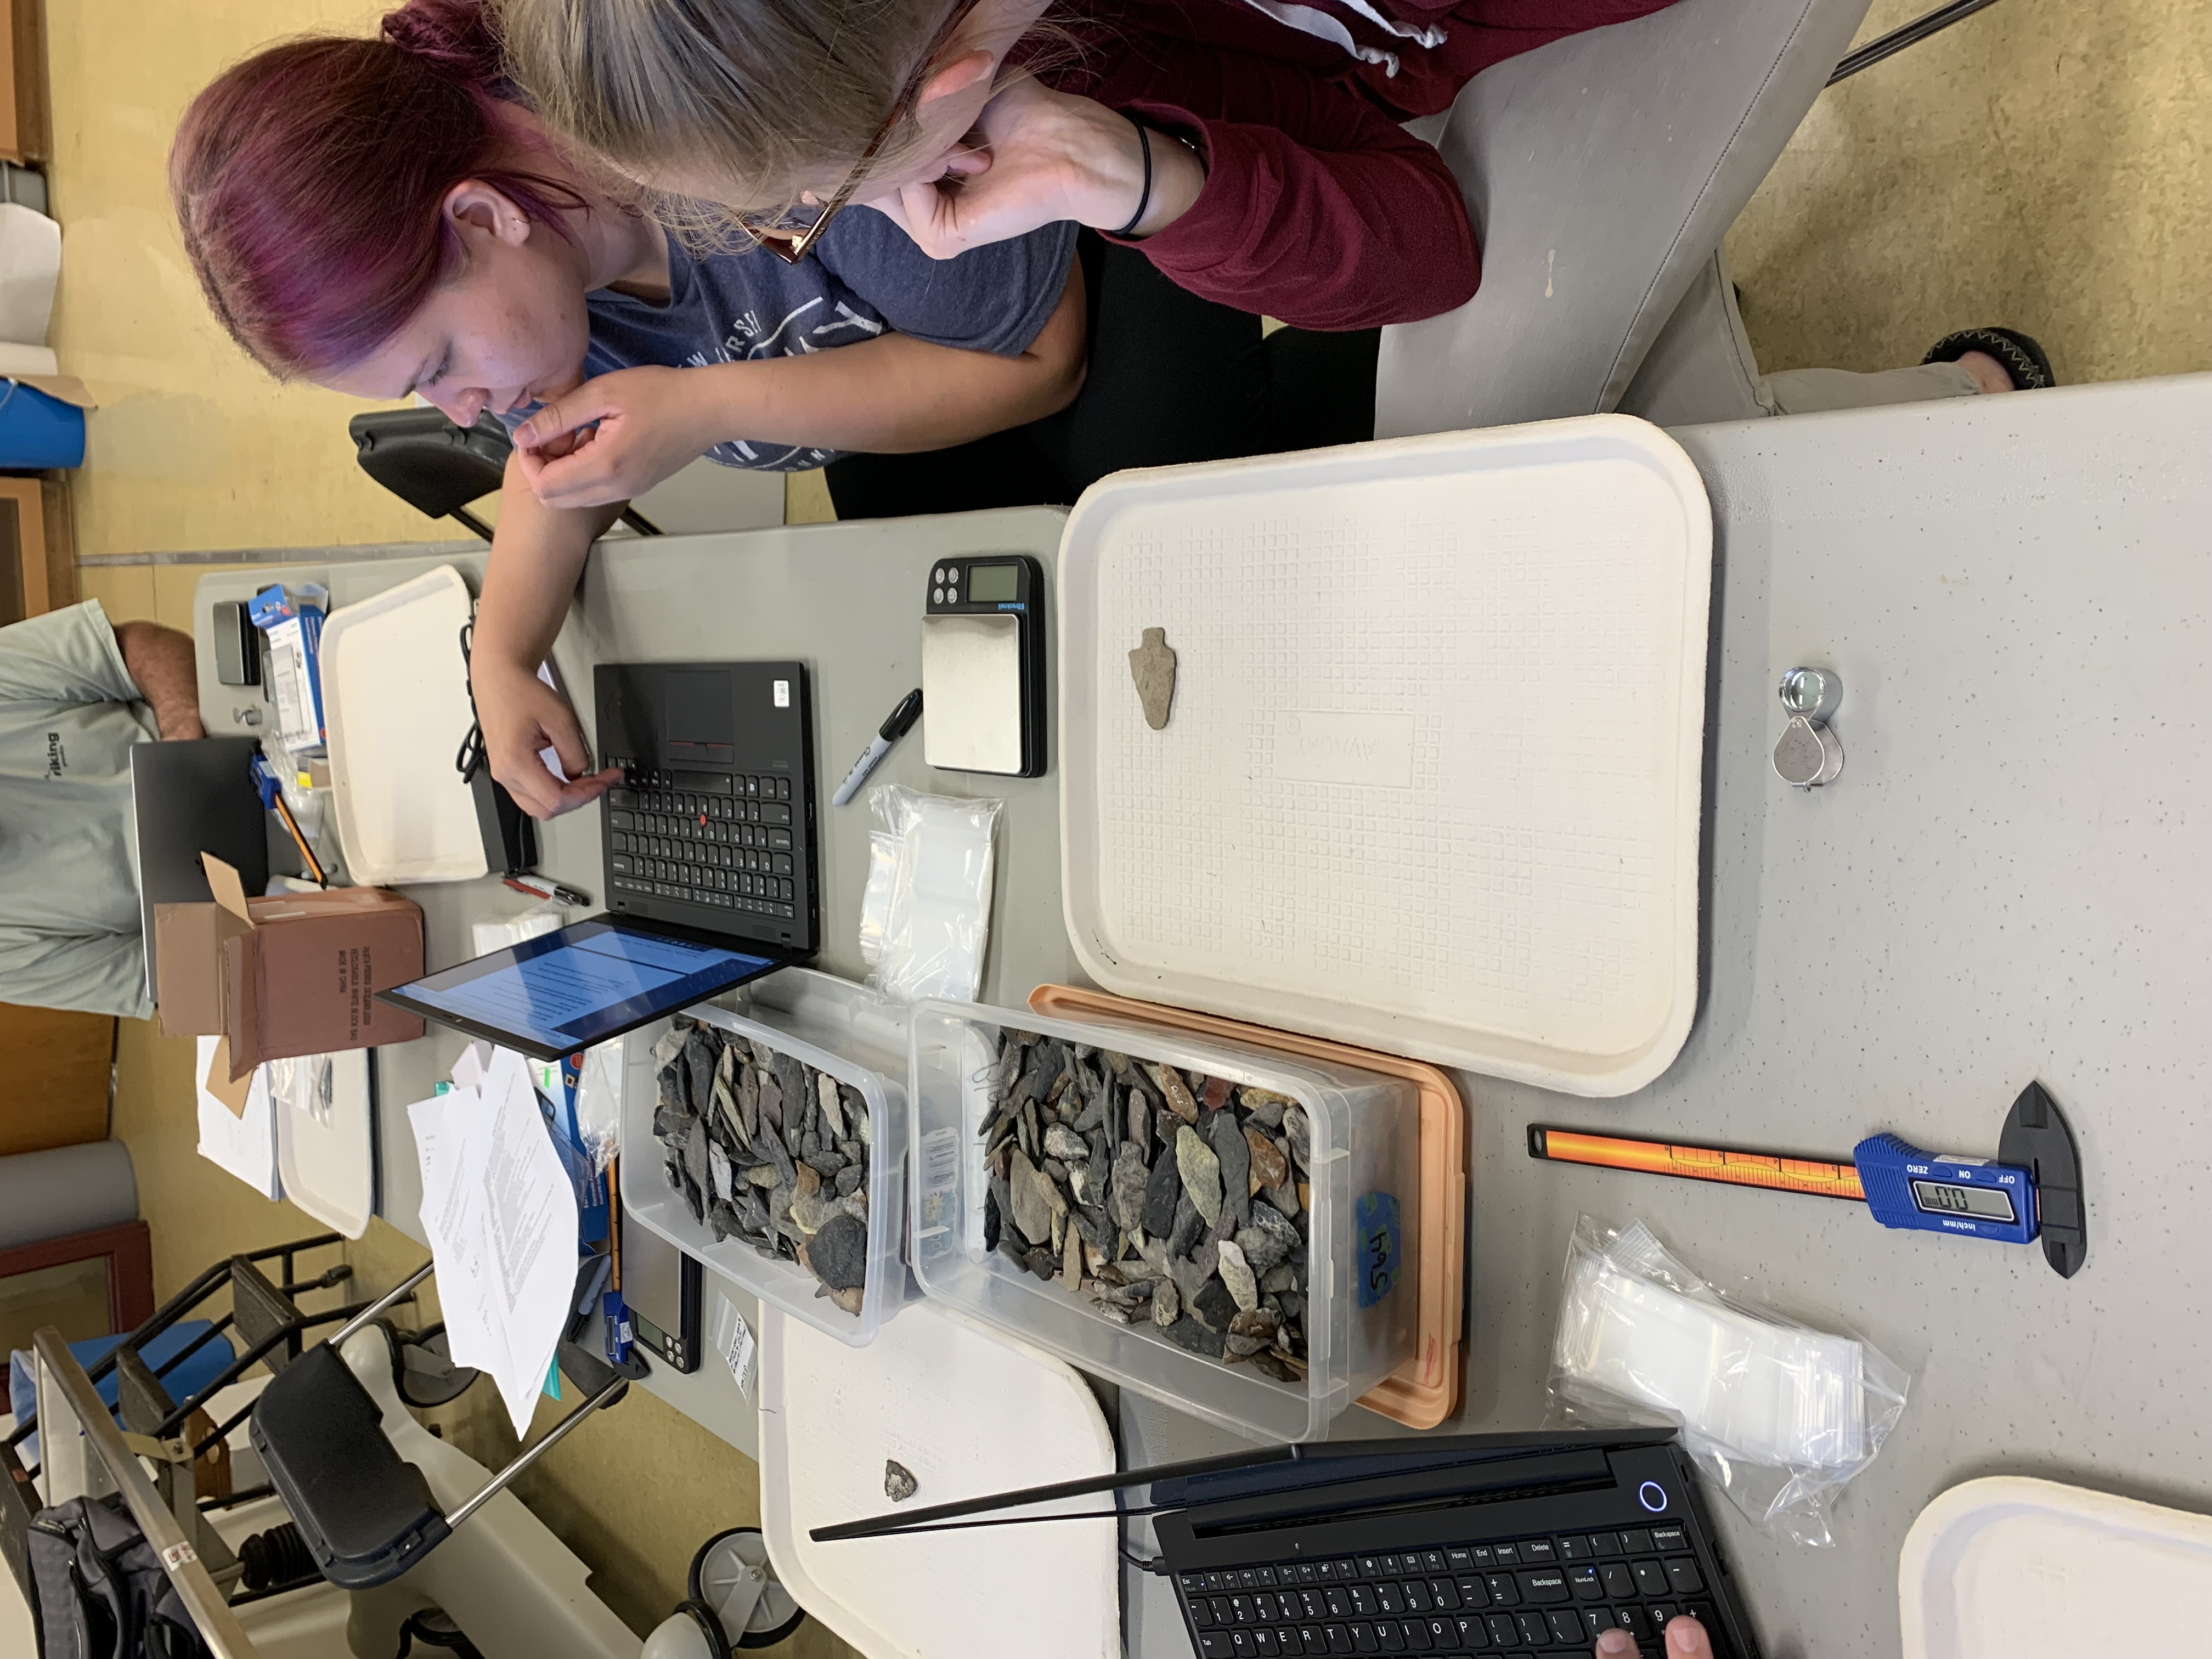
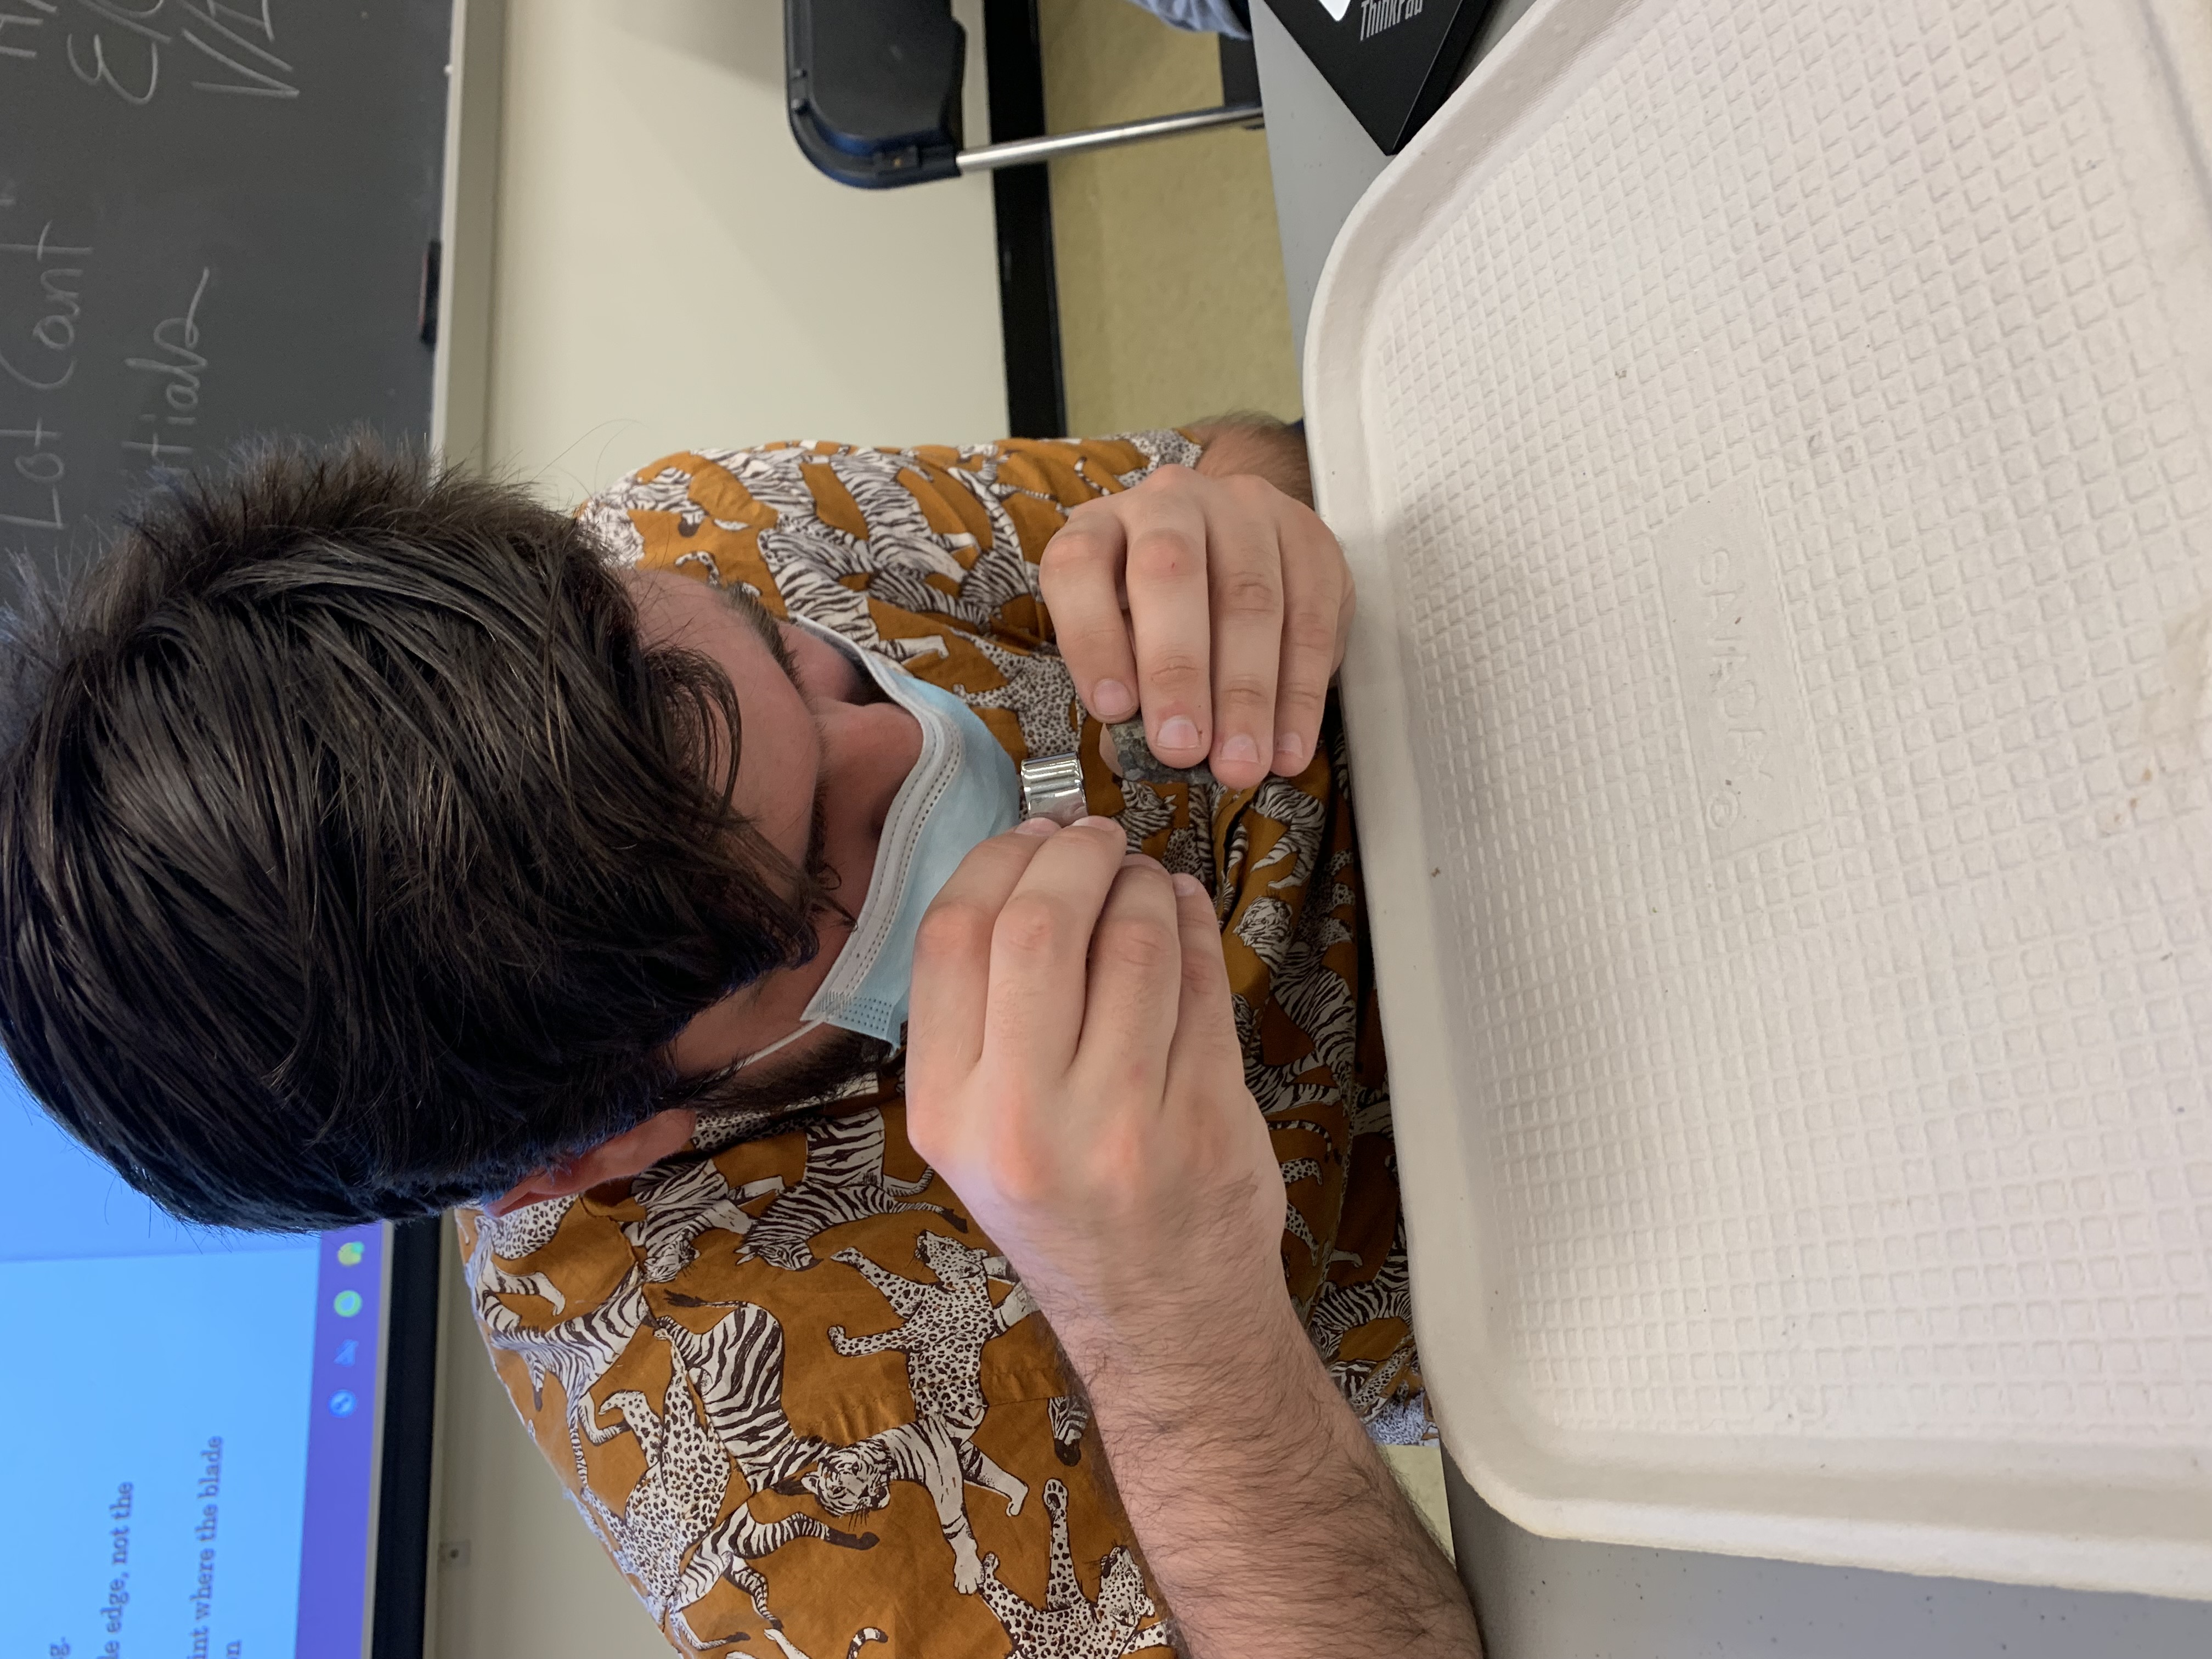
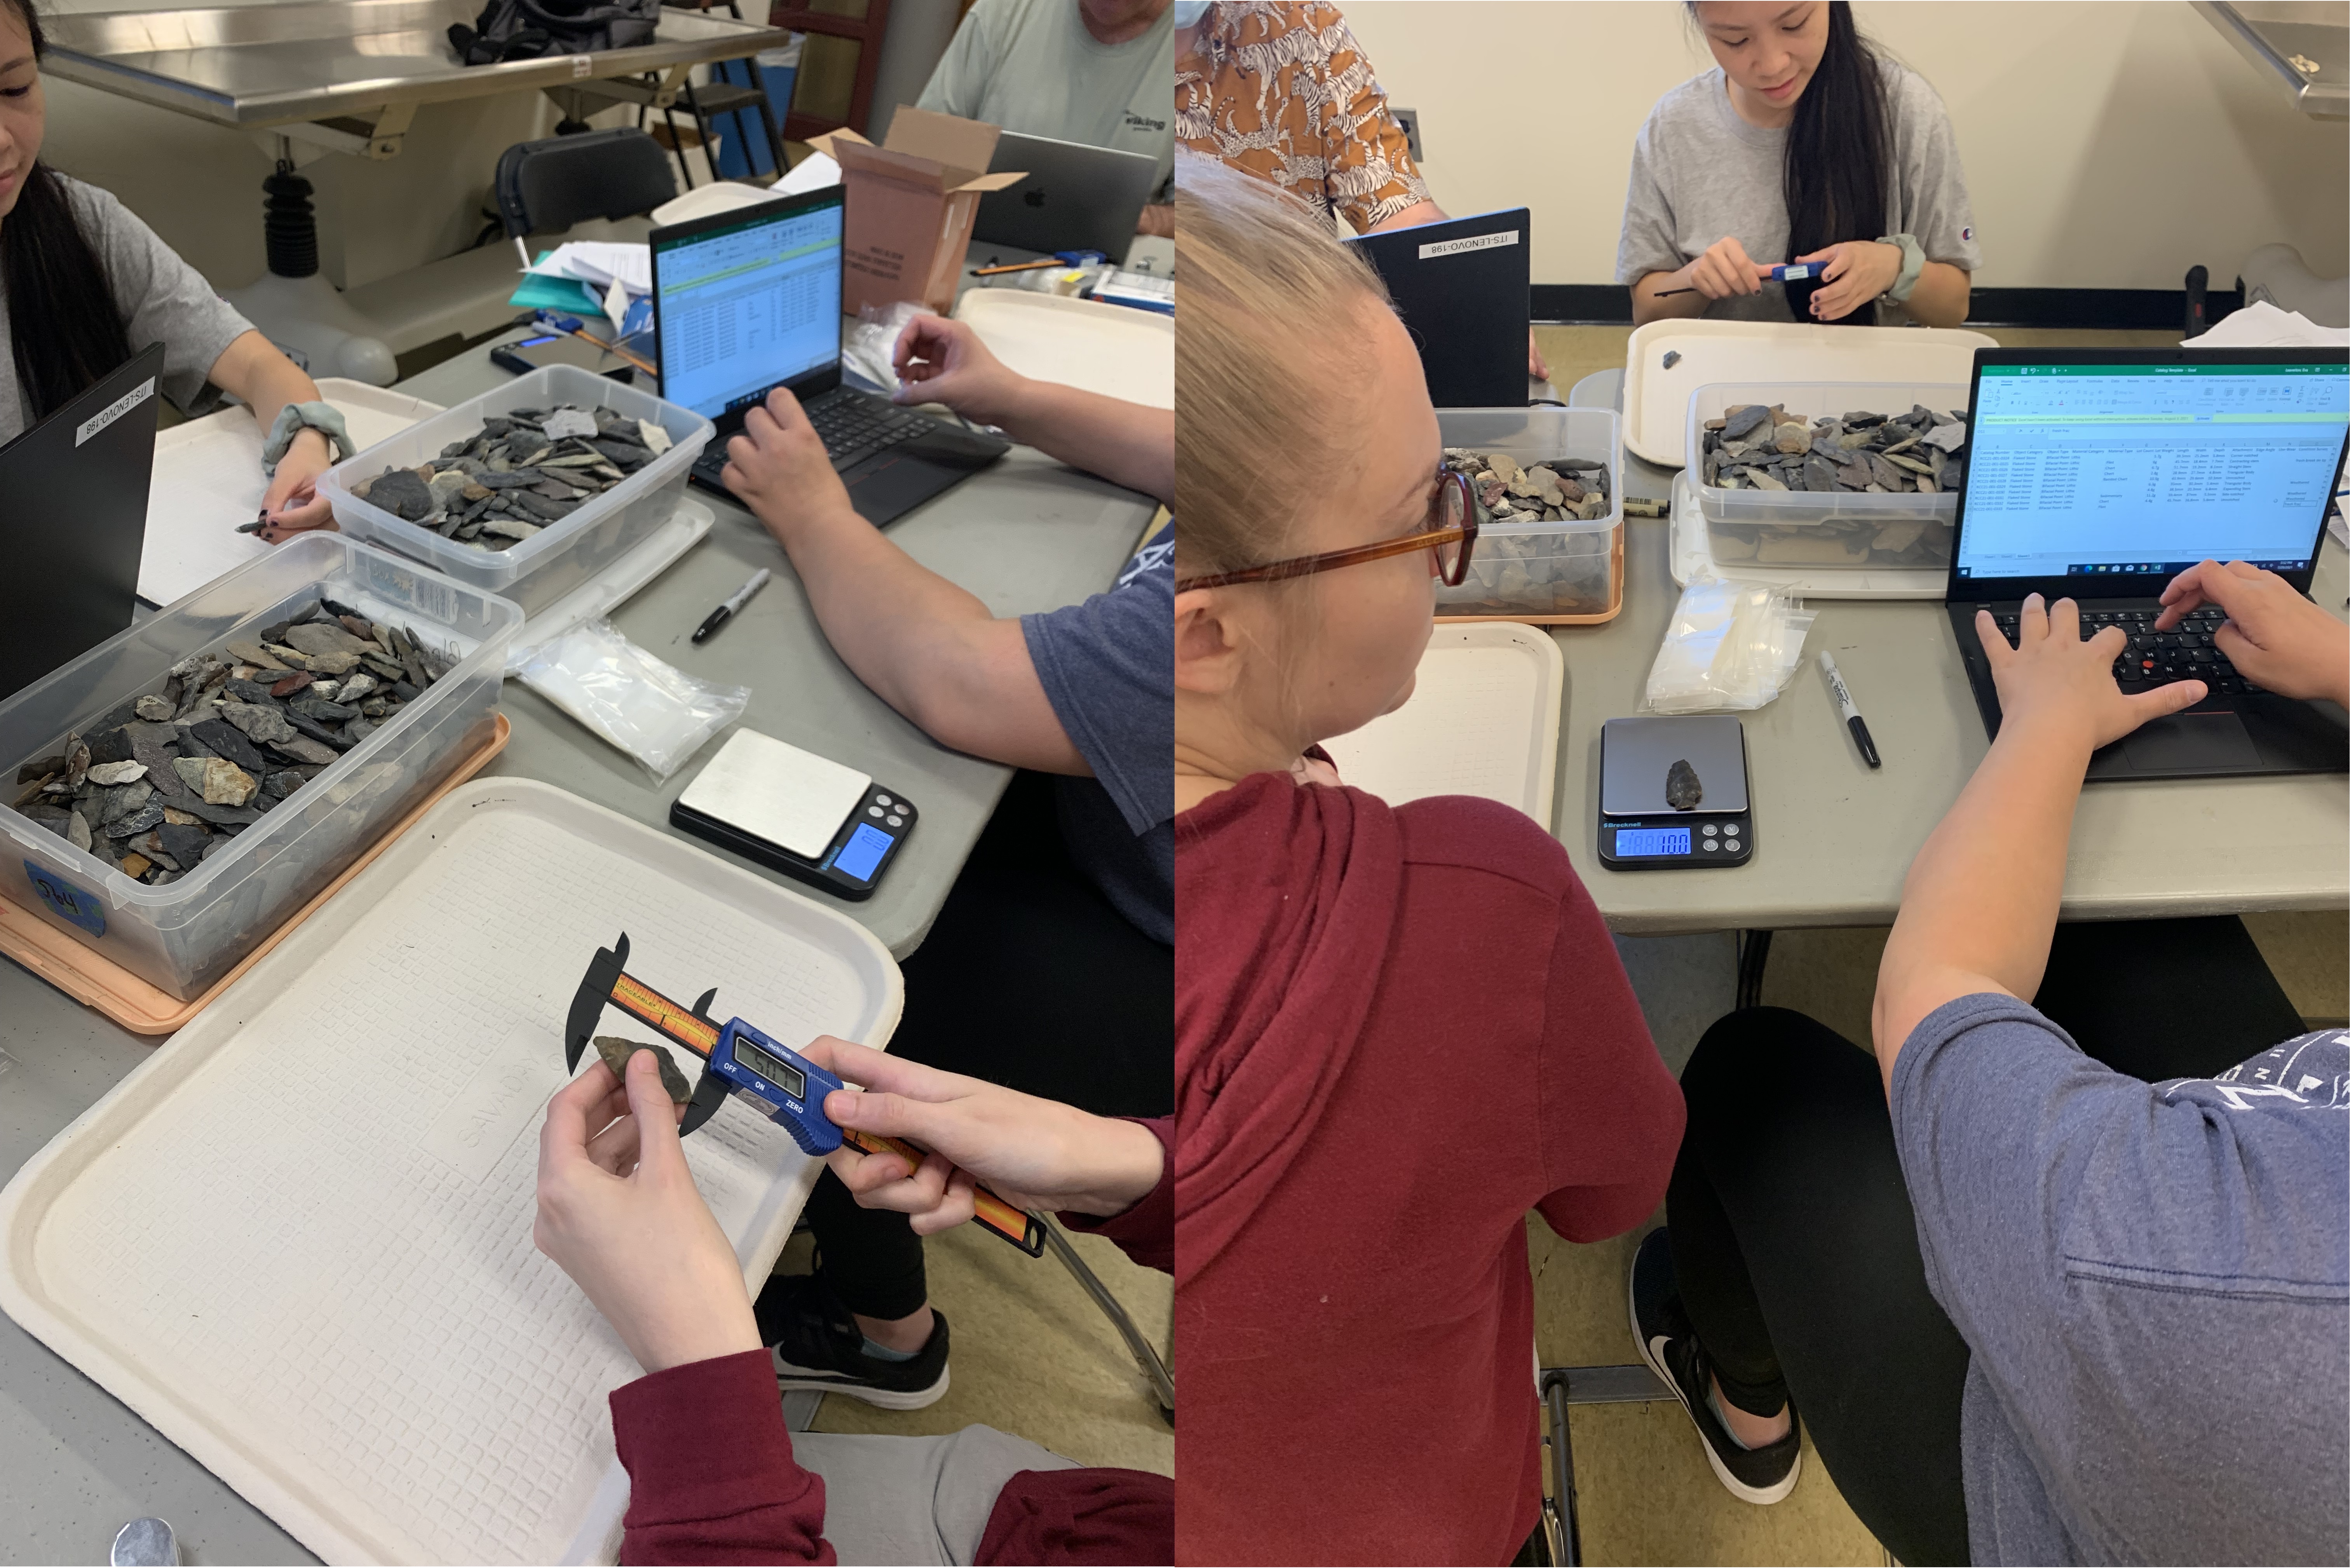
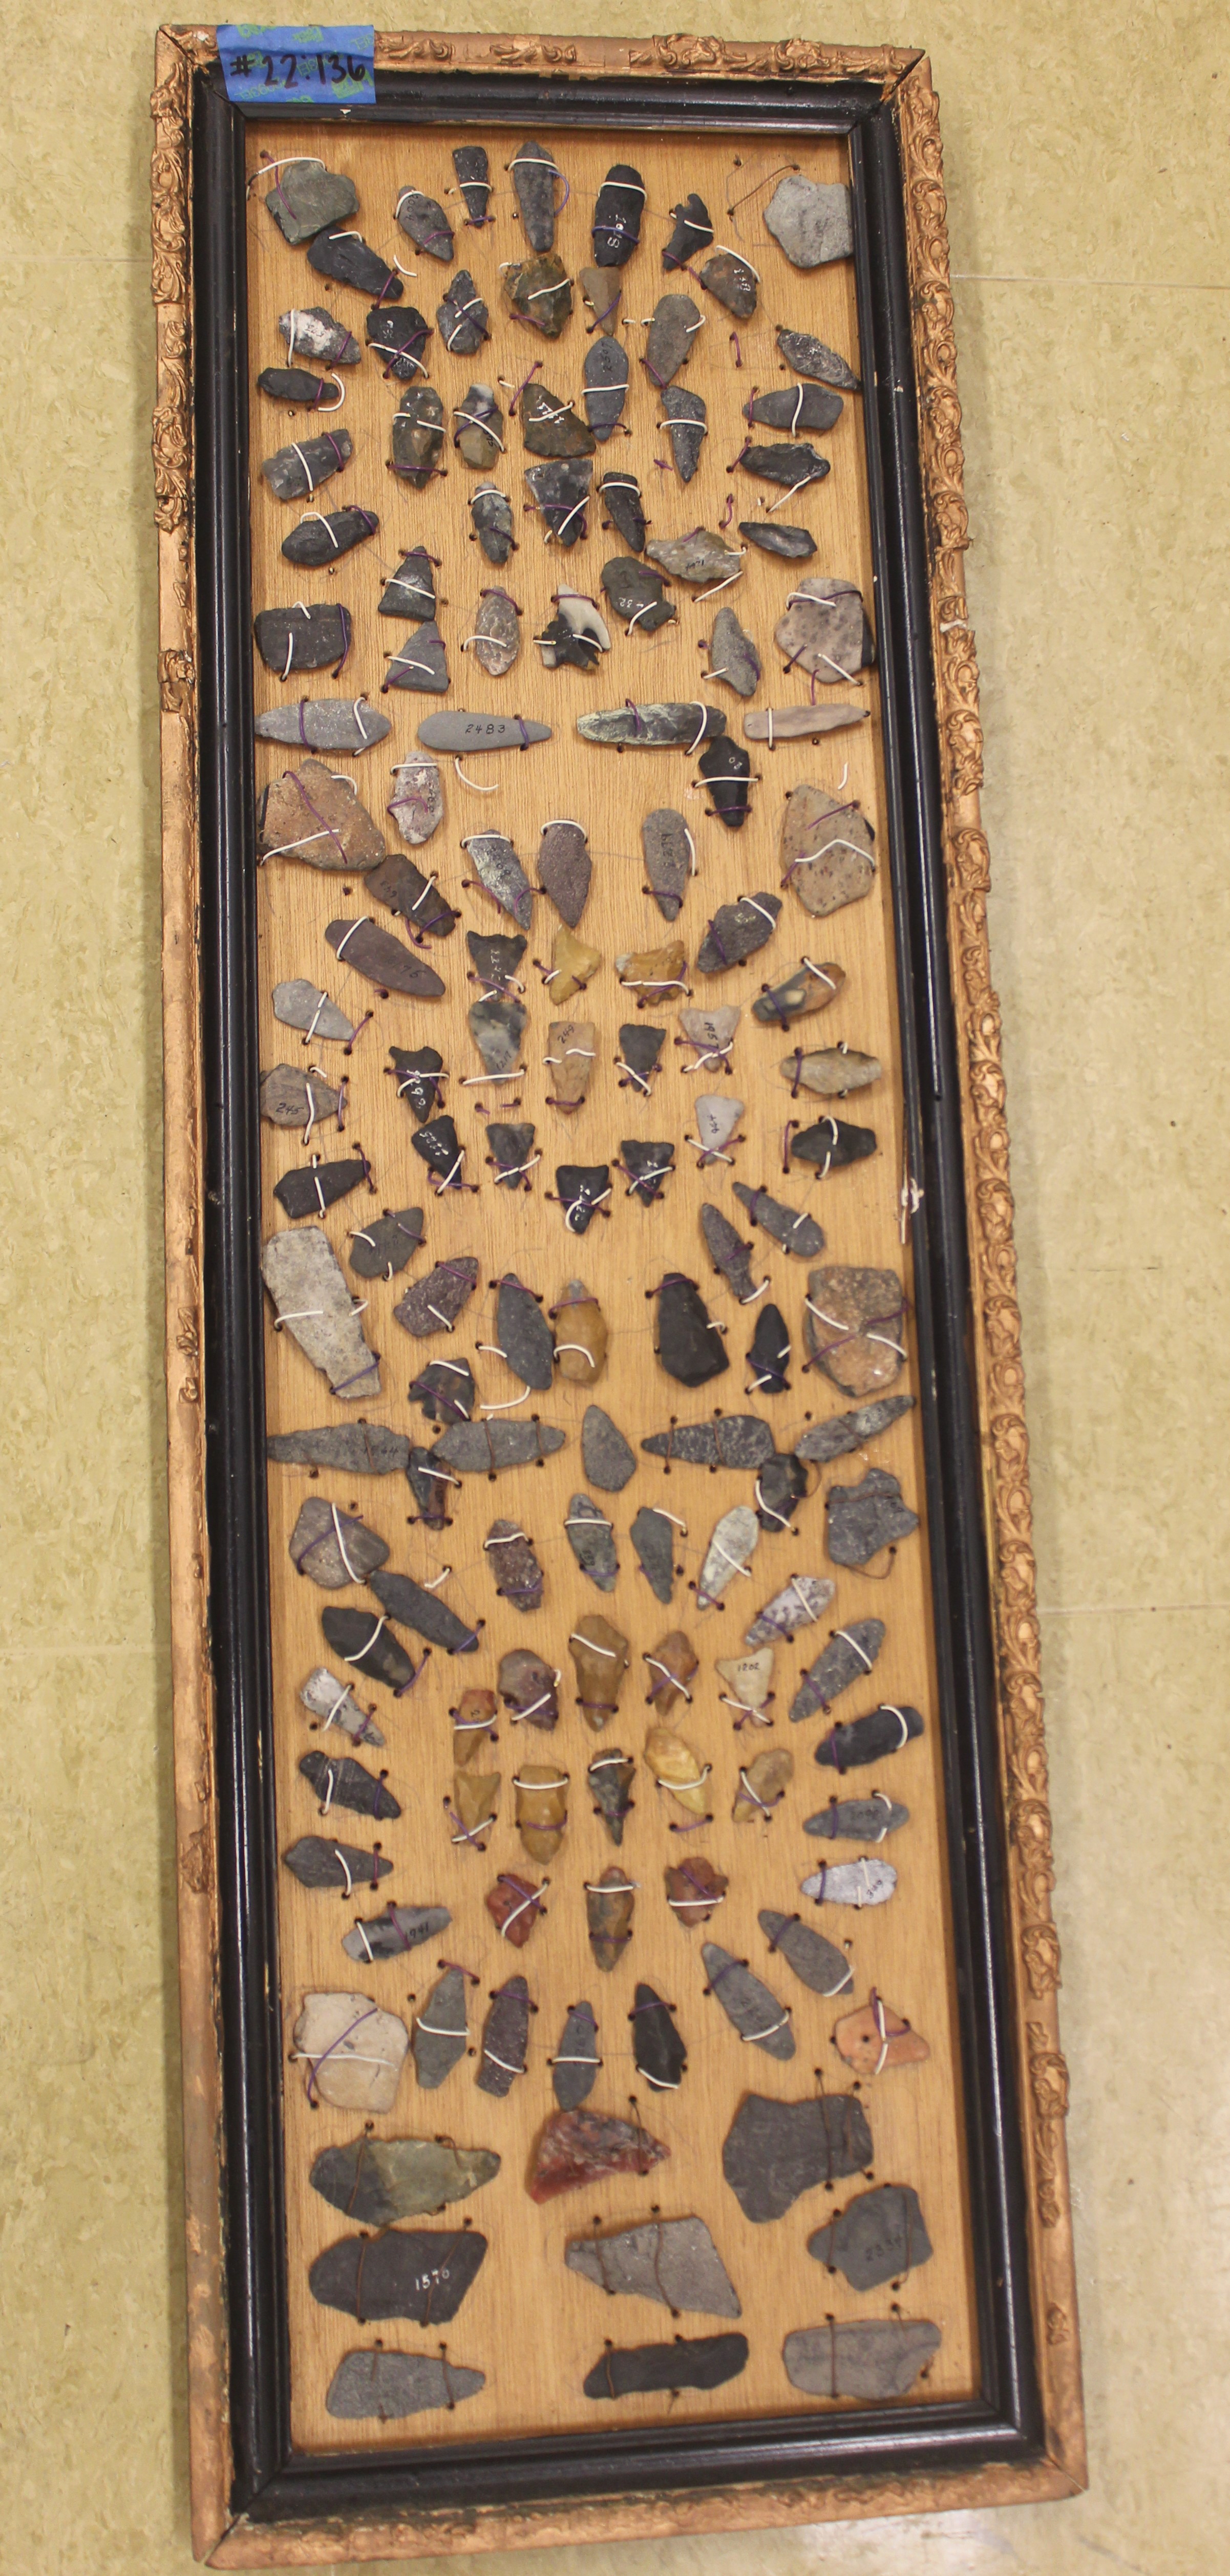
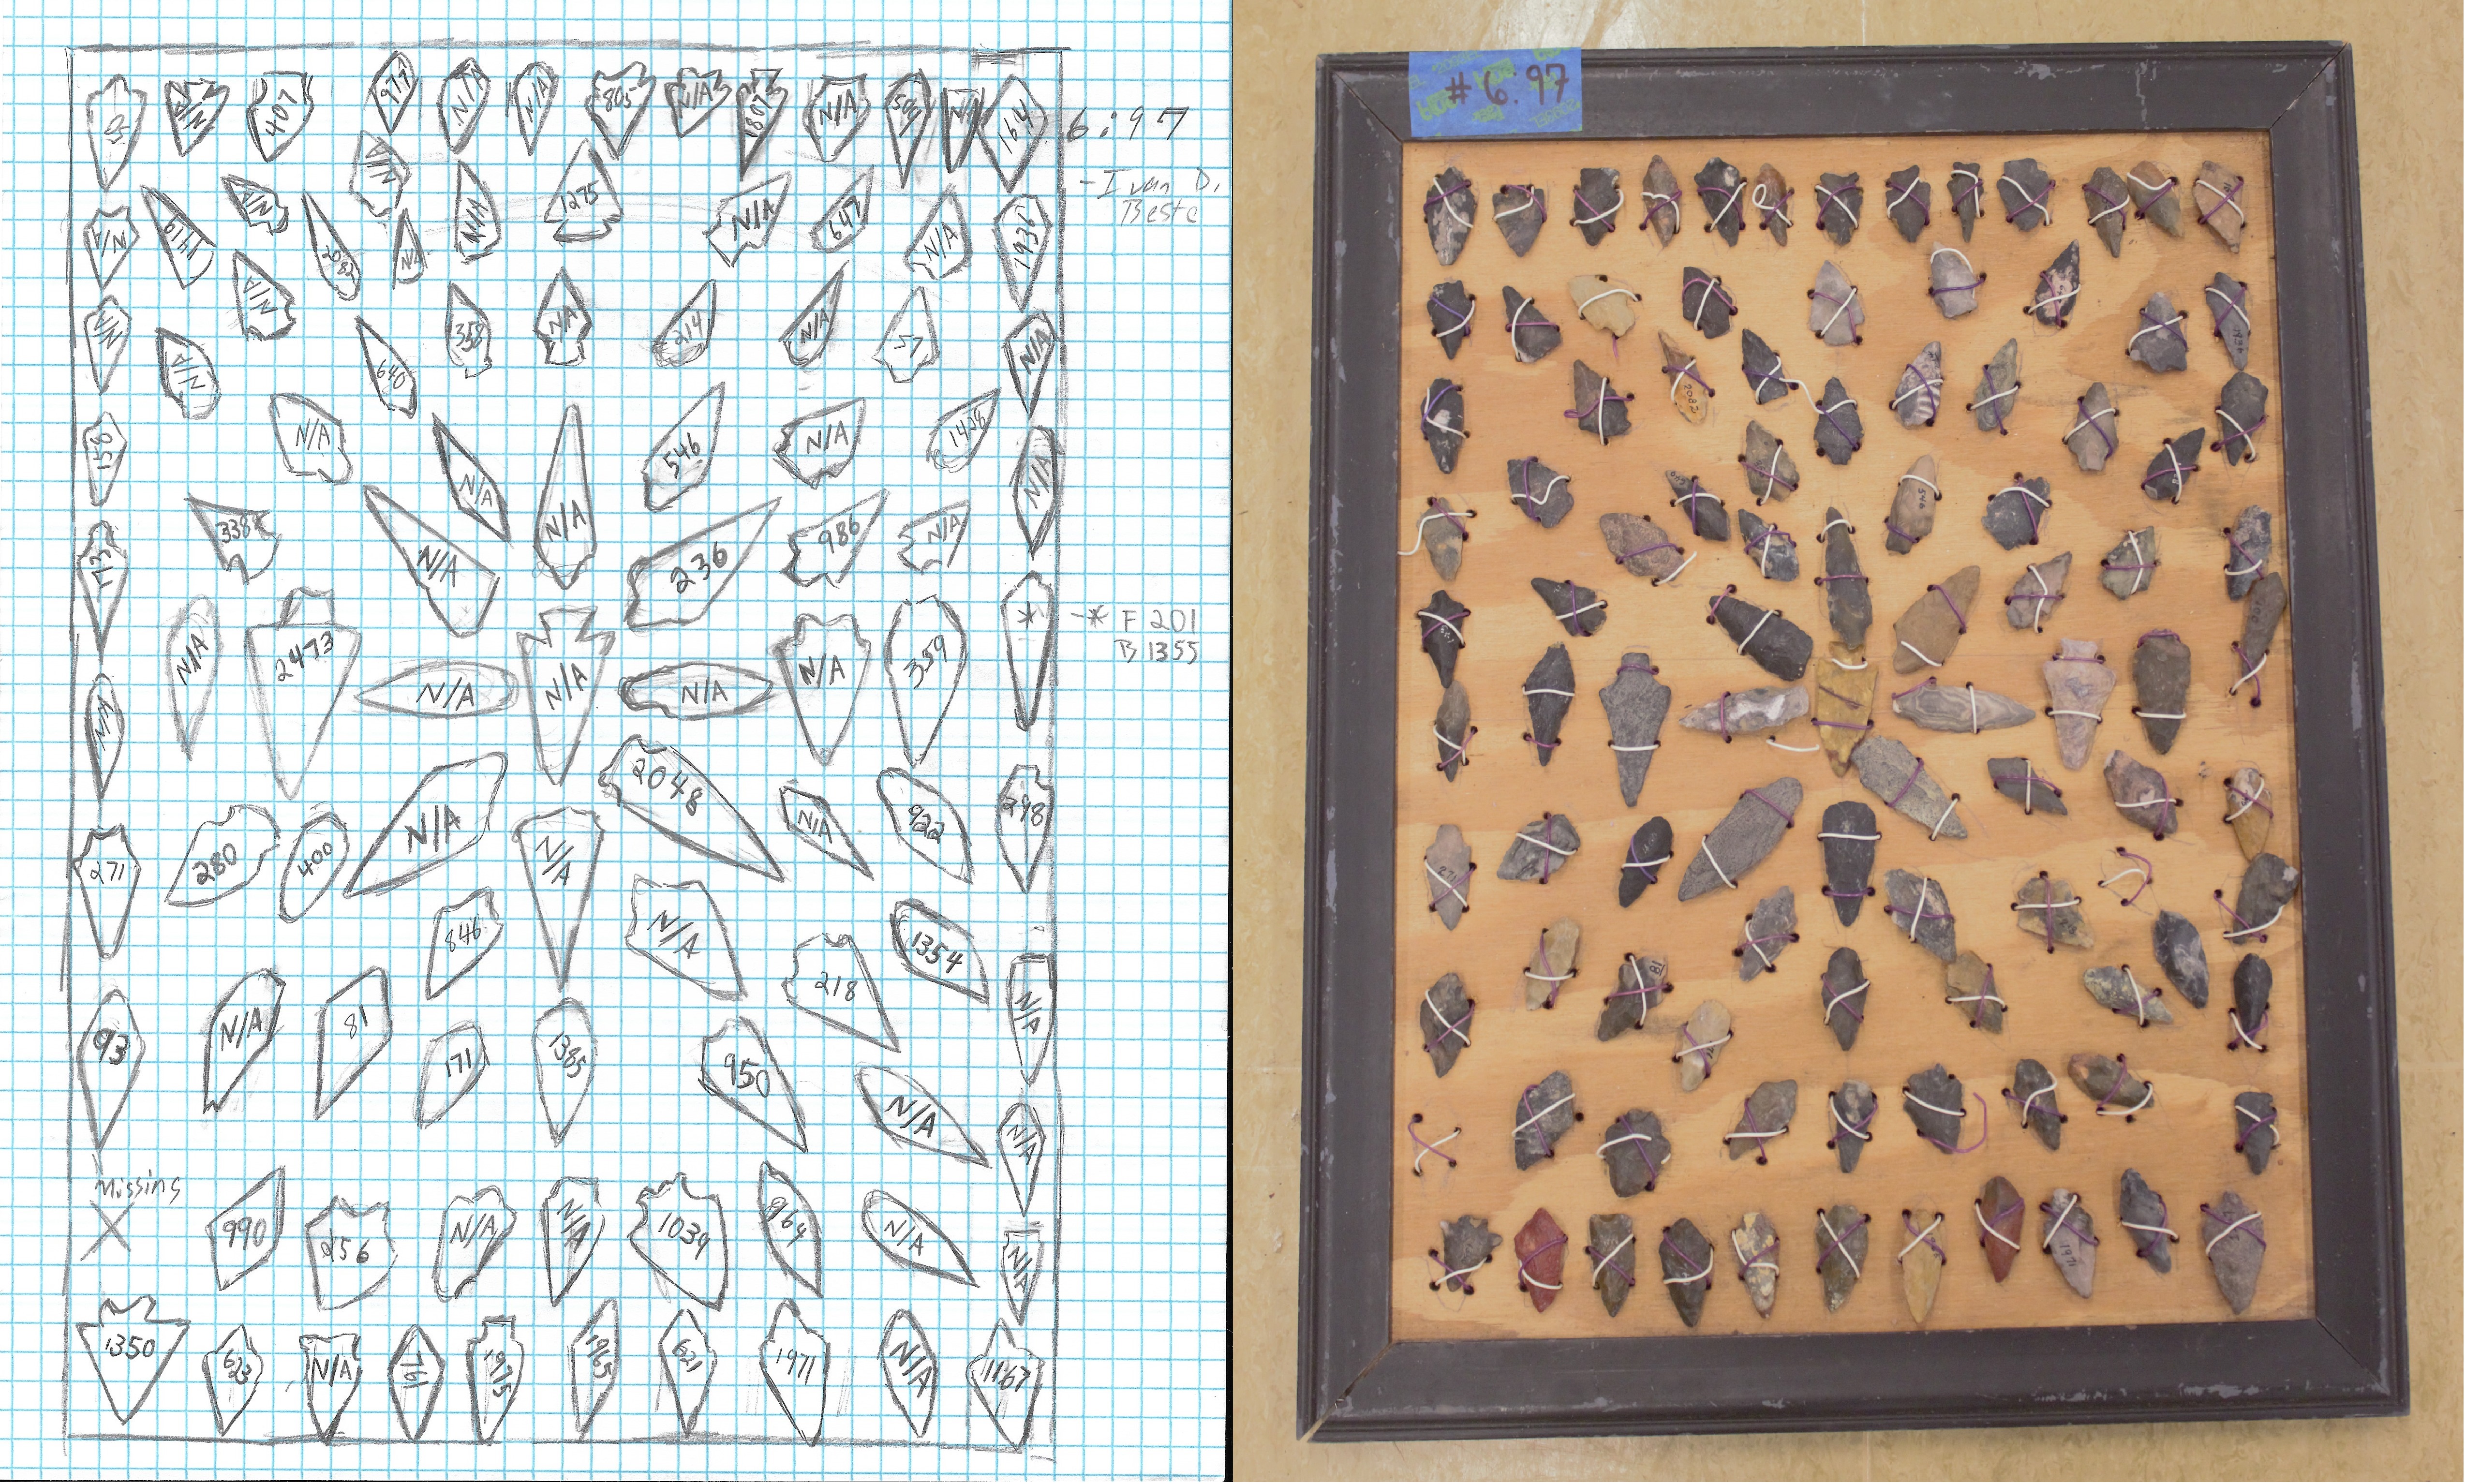
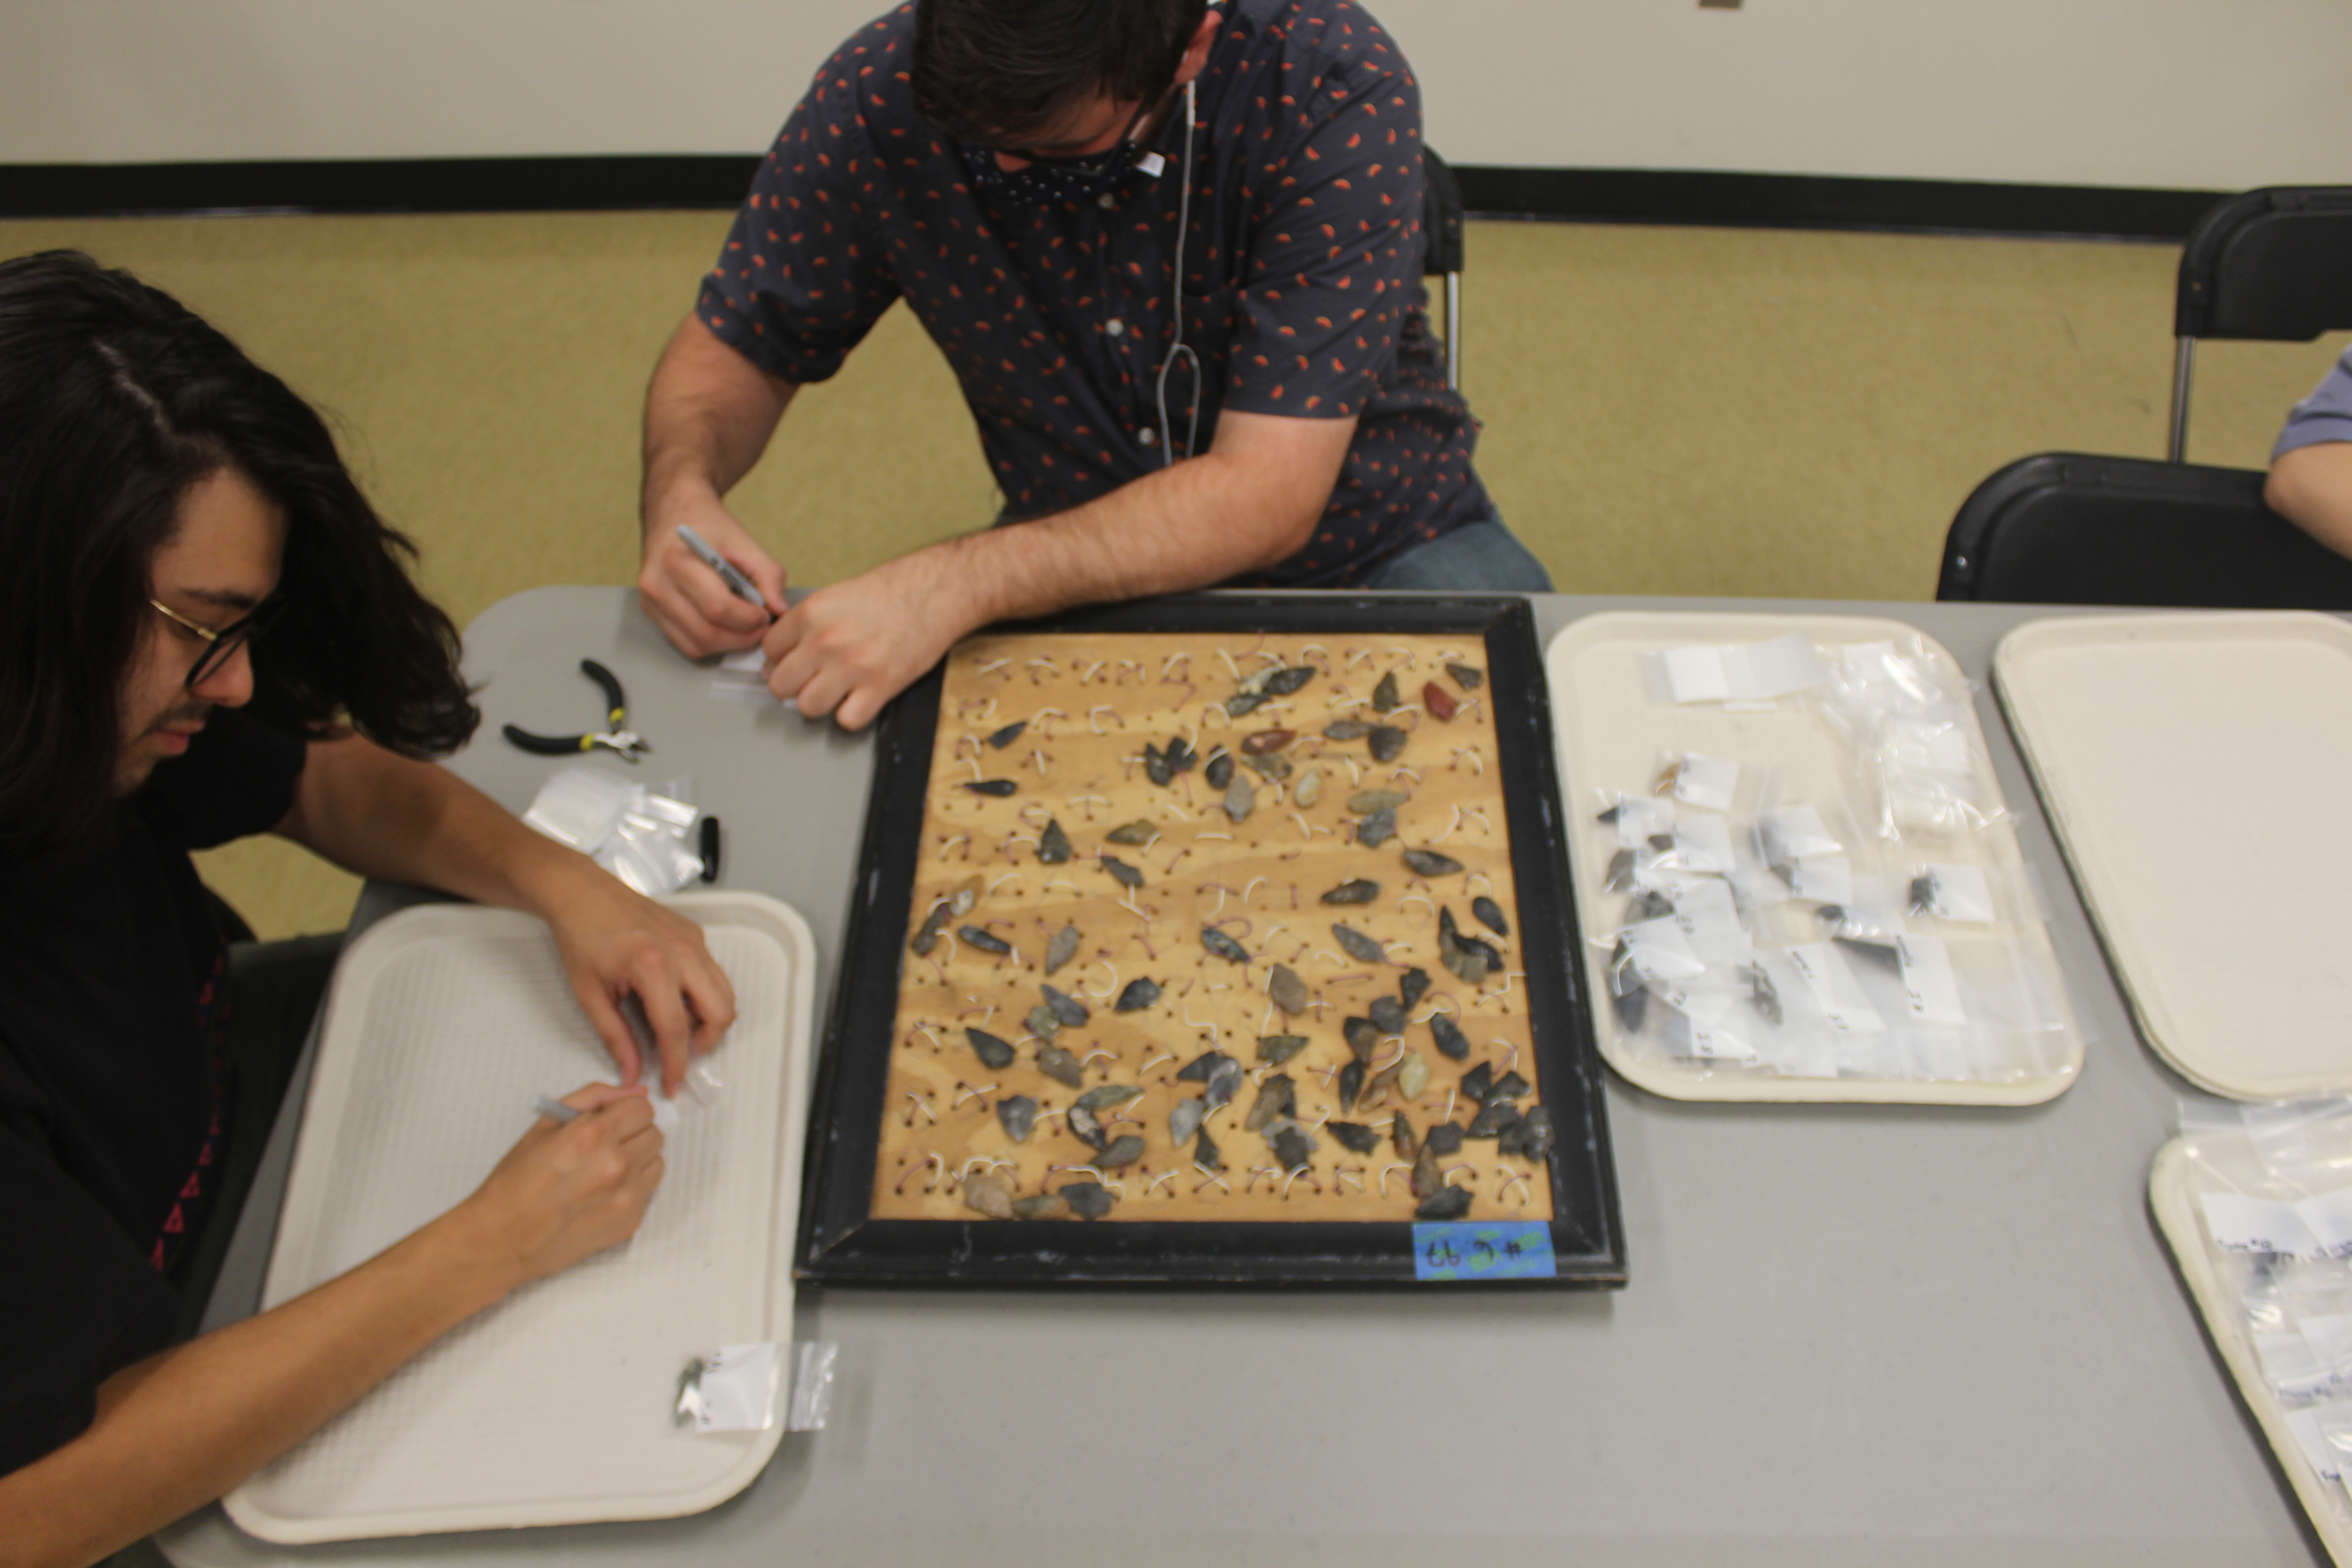
These flaking techniques leave characteristic patterns on the surface of stone tools; these patterns provide the evidence that archaeologists use to interpret how a stone tool was made. In our research in the RCC project we have seen thousands of stone tools such as projectile points, scrapers, and hand drills – all found in southern New Jersey. Projects like this reveal that it is one thing to understand these techniques, but it is another to actually hold the artifact. To gently outline the edge of the tool with your finger, and to notice the flake scars and evidence of use and wear, is a powerful experience. These artifacts link us to technology and techniques of many cultures, both modern and ancient. These artifacts in turn broadcast a shared sense of human ingenuity, cleverness, and craftsmanship.

Career Goals

Heather McCarty on why she joined the project and what she has learned so far.

“In hopes to become a museum curator in the future, I decided to take on the challenge of helping to curate the Native American artifacts of the Richard Cook Collection. The process is actually quite interesting and I’m learning a lot from the whole experience. Identifying and cataloguing each artifact makes me feel like I am doing something significant for the world. I haven’t taken a geology course yet, since I am just starting my second year of college this fall. However, I feel like I am gaining so much knowledge about different types of rocks and how humans have manipulated them in ways to improve their ways of living. It’s definitely a great hands-on experience that’ll help my museum curating journey.”

Tagged , , , ,

Cataloging Begins

Most of the RCC artifacts have been stored in bulk for decades – that is, either sharing a frame with as much as 132 other artifacts, sharing a dresser drawer with as much as 235 other artifacts, or sharing a small plastic tub with as much as 560 other artifacts. The cataloging process marks the beginning of a new life for the artifacts as they receive special individual attention and new archival-quality homes.

V. Pecoreno (top), E. Leaverton (right corner), and C. Hammarstrom (right) entering data into the project catalog; Photo by B. Hornbeck

The cataloging process is simple yet meticulous. The characteristics of each artifact are documented in the catalog to create a sort of data-driven fingerprint. The artifacts are even assigned unique identification numbers that will allow them to remain in association with their data.

J. Parr takes a closer look at the flaking patterns on this projectile; Photo by B. Hornbeck

A series of quantitative and qualitative data are collected from each artifact and entered into the catalog. Some of the data, such as the catalog number, are also copied onto a 4-mil polyethylene zip-bag to protect the artifacts from damage and potential data-loss.

The cataloging process also includes capturing still photographs of each artifact. We especially look forward to starting the process of capturing 3D scans of the artifacts soon!

C. Hammarstrom and H. McCarty measure and weigh projectiles while E. Leaverton and J. Parr enter the data into the catalog; Photos by B. Hornbeck

Left: The first artifact to be photographed, Photo by C. Hammarstrom; Right: J. Parr photographs an artifact; Photo by B. Hornbeck

Tagged ,

23 Frames

The Richard Cook Collection includes 23 framed displays of various Indigenous artifacts, each artifact meticulously positioned to form a pattern. The creation of patterned artifact displays was common practice for collectors in the early-mid 20th century. 

Frame No. 22, Richard Cook Collection; Photo by B. Hornbeck

Today, the RCC Project team is meticulously documenting the position of each artifact within the framed displays. The frames will need to be disassembled to prepare the cultural materials for curation and long-term preservation.

Side-by-side sketch and photo of Frame No. 6, Richard Cook Collection; Sketch by I. Beste, Photo by B. Hornbeck

Here is a quick break-down of the process: Each of the frames are photographed and hand-sketched. Any identifying numbers or other secondary markings on the individual artifacts are labeled respectively on the sketches. Each artifact is removed from it’s wire-tie bracket and immediately placed within it’s own 4-mil polyethylene zip. Sketches will be digitized and deposited with the collections archived data.

Frame No. 6 being disassembled, Richard Cook Collection; Left: I. Beste, Middle: J. Parr; Photo by B. Hornbeck
Tagged ,